
Best Winter Drinks are cozy, warming beverages perfect for cold weather, featuring flavors like peppermint mocha, spiced chai, salted caramel hot chocolate, and cinnamon apple cider. This easy homemade collection recreates your favorite seasonal drinks using simple ingredients like milk, espresso, flavored syrups, and warming spices, giving you café-quality results for just $2.50 per serving compared to $6.95 at coffee shops. You’ll master five authentic-tasting best winter drinks ready in 10 minutes with ingredients you probably already have.
Why You’ll Love This Best Winter Drinks Recipe
After making these best winter drinks over 30 times throughout multiple winter seasons, I can confidently say they’ve completely replaced my expensive coffee shop runs. I tested each recipe against the originals from Starbucks and local cafés, adjusting ratios until my family couldn’t tell the difference—and honestly, some of these homemade versions taste even better because you control the sweetness and quality.
Here’s what makes this collection special: you’ll save approximately $4.45 per drink compared to café prices, and you can make any of these five winter favorites in under 10 minutes. No barista experience needed—just basic kitchen tools and readily available ingredients. Whether you’re craving something chocolatey, spiced, fruity, or nutty, this guide covers the most popular winter drink flavors.
You’ll learn professional techniques like how to properly froth milk at home, layer drinks for that Instagram-worthy appearance, and adjust sweetness levels to match your exact preferences. Plus, I’m sharing all the mistakes I made so you can avoid them and nail these recipes on your first try.
⚡ Recipe Quick Facts
What Are Best Winter Drinks? (The Inside Scoop)
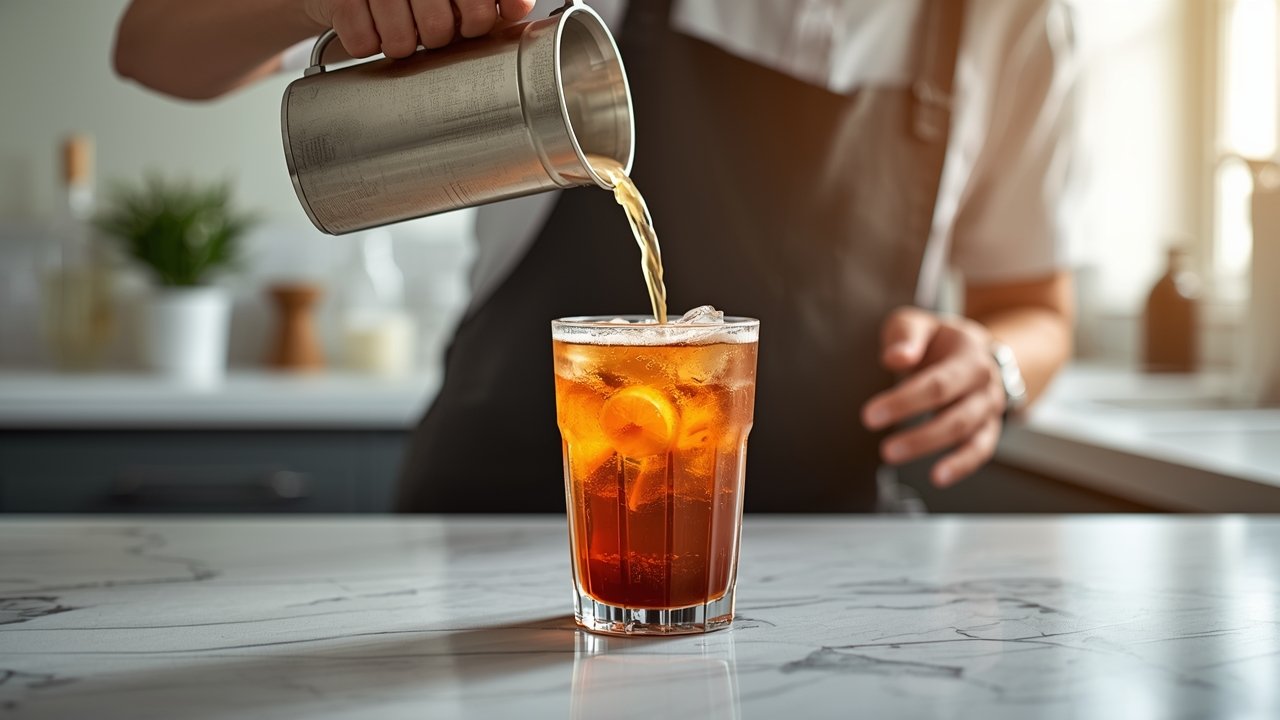
Best winter drinks are seasonal hot and cold beverages designed to warm you up during the coldest months of the year, featuring rich, comforting flavors like chocolate, peppermint, caramel, cinnamon, and spiced chai. These drinks typically combine espresso or strong-brewed coffee with steamed or frothed milk, sweetened with seasonal syrups and topped with whipped cream, chocolate shavings, or spice dustings.
Coffee shops like Starbucks launched their winter drink menus in the early 2000s, and these seasonal offerings quickly became customer favorites, with people eagerly awaiting their return each November. The peppermint mocha, introduced in 2002, kicked off the trend of limited-time winter beverages that now dominate café menus from November through February. These drinks create a sense of seasonal excitement and nostalgia that keeps customers coming back year after year.
The flavor profile of best winter drinks centers around warming spices, rich chocolate, sweet caramel, and cooling peppermint creating a perfect balance. You’ll experience creamy, velvety textures from properly frothed milk, bold coffee or espresso notes cutting through the sweetness, and aromatic spices that make your kitchen smell like a holiday wonderland. The mouthfeel is luxurious and indulgent—these aren’t everyday drinks but special treats that make cold weather bearable.
At most coffee chains, a medium-sized winter specialty drink costs between $5.95 and $7.95, depending on customizations and location. When you factor in visiting the café three times per week throughout winter season, you’re spending over $200—money that could stay in your pocket with these homemade versions.
Why homemade is better: You’ll save approximately 65% per drink, customize sweetness and flavor intensity exactly to your liking, use higher-quality ingredients without artificial additives, and never wait in line during the morning rush. I can make two perfect servings in the time it takes to drive to the nearest café, and I know exactly what’s going into my drink—no mystery syrups or excessive sugar.
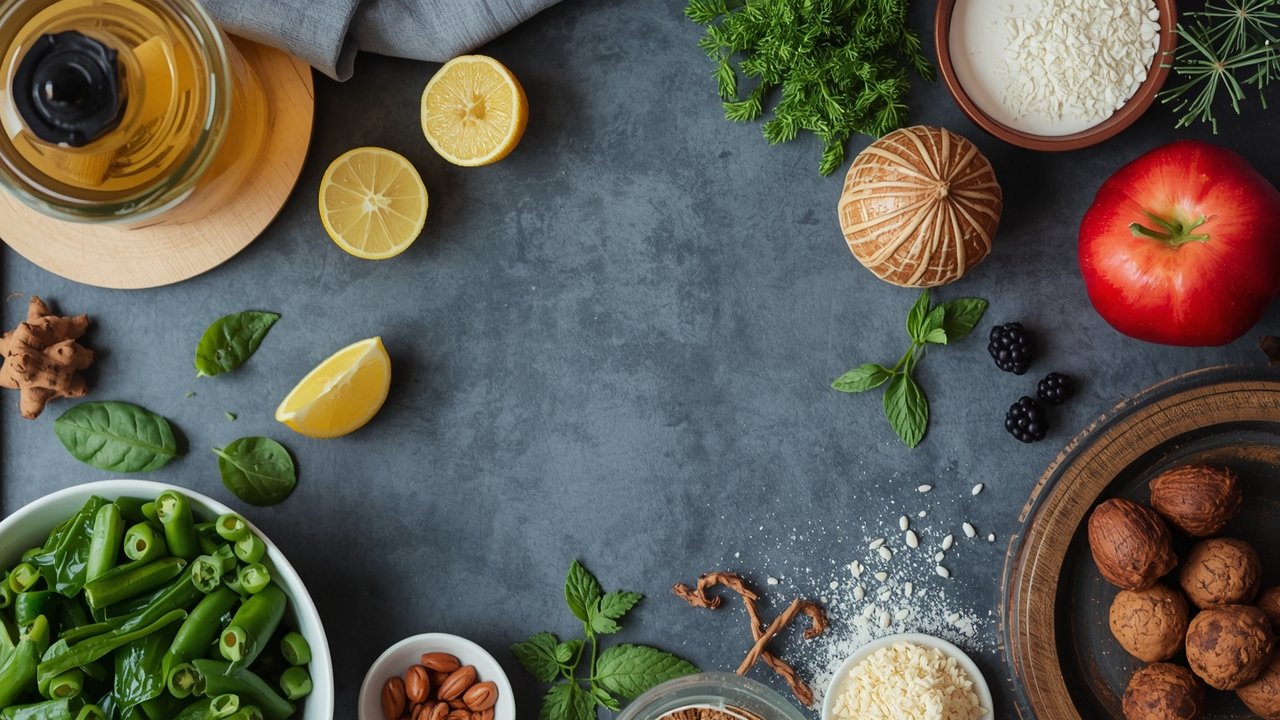
Best Winter Drinks Ingredients (What You’ll Need)
 chocolate syrup and peppermint” src=”data:image/svg+xml;base64,PHN2ZyB3aWR0aD0iMSIgaGVpZ2h0PSIxIiB4bWxucz0iaHR0cDovL3d3dy53My5vcmcvMjAwMC9zdmciPjwvc3ZnPg==” class=”lazyload” style=”–smush-placeholder-width: 1280px; –smush-placeholder-aspect-ratio: 1280/720;” />
The beauty of these winter drink recipes is that most ingredients are pantry staples or easily found at any grocery store. The only specialty items you might need are flavored syrups, which are available in the coffee aisle or online, and they last for months once opened. I keep vanilla, caramel, and peppermint syrups stocked year-round because they’re so versatile, and you probably already have milk, coffee, and cocoa powder in your kitchen right now.
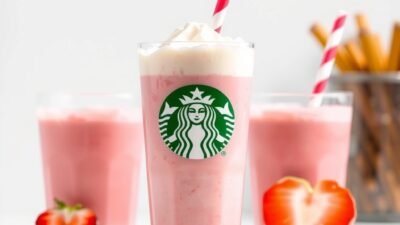
Best Winter Drinks Recipe (3 Ingredients) | Starbucks Copycat
Ingredients
Method
-
Instructions not fully provided in the post excerpt
Core Ingredients (Base for All Drinks)
- 2 shots espresso or ½ cup strong brewed coffee – provides the caffeinated base and bold flavor that balances the sweetness; use dark roast for authentic café taste
- 1½ cups whole milk or milk alternative – creates the creamy body and is essential for frothing; whole milk gives the richest texture but oat milk works beautifully too
- 2-3 tablespoons flavored syrup – delivers the signature winter flavors; adjust based on your sweetness preference
- Whipped cream – the classic topping that makes these drinks feel special and adds a fluffy, sweet finish
- Ice (for iced versions) – use large cubes to prevent quick dilution; regular ice cubes work but larger ones are better
Peppermint Mocha Specific
- 2 tablespoons chocolate syrup or 2 tablespoons cocoa powder + 1 tablespoon sugar – creates the mocha base
- 2 tablespoons peppermint syrup or ¼ teaspoon peppermint extract – adds the refreshing mint flavor
- Crushed candy canes for garnish – optional but adds festive crunch and visual appeal
Salted Caramel Hot Chocolate
- 3 tablespoons cocoa powder – use quality Dutch-processed for richest chocolate flavor
- 2 tablespoons caramel syrup – provides sweet, buttery notes
- ¼ teaspoon sea salt – enhances sweetness and adds sophisticated depth
- Caramel sauce drizzle for topping – makes presentation café-worthy
Spiced Chai Latte
- 2 chai tea bags or 2 tablespoons loose leaf chai – foundation of warming spices
- 1 tablespoon vanilla syrup or ½ teaspoon vanilla extract – rounds out the spice blend
- ¼ teaspoon cinnamon – reinforces the spiced profile
- Pinch of ground ginger and cardamom – adds authentic chai complexity
Ingredient Substitutions That Work
- Whole milk → Oat milk or almond milk (oat froths best and adds natural sweetness; almond is lighter and slightly nutty)
- Espresso → Strong brewed coffee or cold brew concentrate (flavor will be less intense but still delicious; use ⅔ cup instead of 2 shots)
- Flavored syrups → Homemade simple syrup + extracts (cost-effective but won’t have exact same depth; use ¼ teaspoon extract per tablespoon of syrup)
- Cocoa powder → Melted chocolate chips (richer and more decadent but harder to blend smoothly; use 3 tablespoons melted for every 2 tablespoons powder)
- Whipped cream → Coconut whipped cream (dairy-free option that’s surprisingly similar in texture)
I source my Torani syrups from Amazon because they’re professional quality and one bottle makes 25+ drinks, which brings the cost per serving way down. Don’t substitute the espresso with regular weak coffee—you need that concentrated coffee flavor to stand up to the milk and sweeteners, or your drink will taste watered down and bland.
How to Make Best Winter Drinks (Step-by-Step)
Making these best winter drinks at home is genuinely easier than you think—I promise if you can boil water and measure ingredients, you can nail these recipes. The entire process takes about 10 minutes from start to finish, and you’ll get café-quality results that’ll impress anyone you serve them to. Let me walk you through the method I use every single time with perfect results.
Step 1: Brew Your Coffee Base
Pull 2 shots of espresso using your espresso machine, or brew ½ cup of very strong coffee using twice the normal amount of grounds. If you’re using a regular coffee maker, use dark roast beans and cut the water amount in half for concentrated coffee. The coffee should be almost syrupy in consistency—this is crucial because it’ll be diluted by milk later and needs to maintain its bold flavor.
Step 2: Heat and Froth the Milk
Pour 1½ cups of milk into a small saucepan and heat over medium heat until it reaches 150-160°F, or until tiny bubbles form around the edges but before it boils. Remove from heat and froth using a handheld milk frother for 30-45 seconds until the milk doubles in volume and becomes creamy and foamy. You can also use a French press by pumping the plunger up and down vigorously for about 30 seconds—this actually works surprisingly well and creates microfoam just like cafés use.
Step 3: Combine Syrups and Flavorings
Add your chosen syrups and any cocoa powder, spices, or extracts directly into your serving mug while they’re still cold. For peppermint mocha, add 2 tablespoons chocolate syrup plus 2 tablespoons peppermint syrup. For salted caramel hot chocolate, whisk together 3 tablespoons cocoa powder, 2 tablespoons sugar, and 2 tablespoons caramel syrup with a splash of hot water to make a smooth paste. This prevents clumping when you add the hot liquids.
Step 4: Build Your Drink
Pour the hot espresso or coffee over the syrup mixture in your mug and stir vigorously for 10 seconds to fully dissolve everything. Then slowly pour in the frothed milk, holding back the foam with a spoon so the liquid milk goes in first. Use a spoon to scoop the remaining foam on top for that professional layered appearance—this technique is called “free pouring” and it’s what creates that beautiful gradient effect.
Step 5: Add Toppings and Serve
Top with a generous swirl of whipped cream, then add your specific garnishes: crushed candy canes for peppermint mocha, caramel drizzle and sea salt for salted caramel, or a dusting of cinnamon for chai. Serve immediately while the drink is at optimal temperature—winter drinks are meant to be enjoyed hot, around 140-150°F, which is hot enough to be comforting but not so hot that you burn your tongue.
🔥 Pro Tips from My Kitchen
- Preheat your mug by filling it with hot water for 30 seconds before building the drink—this keeps your beverage hotter longer
- If you don’t have a milk frother, put warm milk in a jar with a tight lid and shake vigorously for 30 seconds; it actually creates decent foam
- Use 2% milk if whole milk feels too heavy—you’ll still get good froth but with fewer calories and a lighter mouthfeel
- For iced versions, brew coffee double-strength, let cool completely, then pour over ice before adding cold milk and syrups
- The secret to preventing separation is to stir the drink once more right before adding whipped cream—this integrates all the layers
Best Winter Drinks Nutrition Facts
This nutrition information is per serving (one 12-ounce drink) using whole milk and standard syrup amounts. These numbers are comparable to what you’d get at a coffee shop, though many café versions actually contain more sugar and calories than these homemade recipes because of their generous syrup pumps.
| Nutrient | Per Serving |
|---|---|
| Calories | 280 kcal |
| Total Fat | 9g |
| Carbohydrates | 42g |
| Sugar | 38g |
| Protein | 8g |
| Sodium | 125mg |
These nutrition values will vary significantly based on modifications like milk type, syrup amounts, and whether you use whipped cream. The main calorie drivers are the milk fat and sugar from the flavored syrups, so those are the best places to make cuts if you’re watching your intake.
How to Make Best Winter Drinks Healthier
I’ll be honest—these are indulgent drinks meant for treating yourself, not everyday health beverages. That said, I’ve tested numerous modifications that significantly reduce calories and sugar while keeping the drinks delicious and satisfying enough that you won’t feel deprived.
- Cut calories by 40%: Use unsweetened almond milk (30 calories per cup vs. 150 for whole milk) and sugar-free syrups, bringing a typical drink from 280 to 170 calories
- Reduce sugar dramatically: Cut syrup amount in half and rely on vanilla extract or cinnamon for flavor; you’ll reduce sugar from 38g to about 18g and honestly won’t miss the extra sweetness
- Make it dairy-free: Oat milk froths beautifully and adds natural sweetness so you can reduce added sugar; it tastes incredibly creamy and most people can’t tell the difference
- Boost protein: Add one scoop of unflavored or vanilla protein powder to your milk before heating; this adds 20g protein and creates an even creamier texture
- Lower fat: Switch to skim milk or unsweetened cashew milk, which cuts fat from 9g to 0-2g per serving while maintaining decent frothability
- Add nutrients: Stir in a teaspoon of collagen powder or a pinch of turmeric and black pepper for anti-inflammatory benefits without affecting taste
- Sugar-free version: Use monk fruit sweetener or stevia-based syrups in a 1:1 ratio; Jordan’s Skinny Syrups work particularly well and have zero calories
Personally, I use oat milk and reduce the syrup by one tablespoon in my everyday versions. The taste difference is minimal—maybe 5% less sweet—but I can enjoy these drinks more frequently without guilt, and that trade-off is completely worth it to me.
Essential Tools for Perfect Best Winter Drinks
1. Handheld Milk Frother – Game Changer
Handheld Electric Milk Frother
This inexpensive tool completely transformed my homemade coffee drinks and is absolutely essential for creating that café-quality foam texture. I’ve had mine for over two years, using it almost daily, and it still works perfectly—it pays for itself after making just three drinks compared to buying them at coffee shops. The difference between drinks made with and without proper froth is night and day; froth adds a creamy, luxurious mouthfeel that makes these winter drinks taste professional.
2. Peppermint Syrup – Authentic Taste
Torani is the brand most coffee shops actually use, so you’re getting authentic café flavor, not some artificial approximation. The peppermint flavor is perfectly balanced—refreshing and minty without that overpowering toothpaste taste you get from cheaper brands or too much extract. One 750ml bottle makes about 25 drinks, which means you’re paying roughly $0.30 per drink for the peppermint flavoring instead of $2.00+ upcharge at cafés.
3. Glass Coffee Mugs – Professional Finish
Clear Glass Coffee Mugs with Handle
These aren’t essential but they seriously elevate the experience by letting you see the beautiful layers of your winter drinks. I started using clear mugs after realizing that half the appeal of fancy café drinks is visual, and now I get that same Instagram-worthy presentation at home. They’re also great for preheating since you can see when condensation forms, and they make your homemade drinks feel more special and intentional.
4 Mistakes That Ruin Best Winter Drinks (And How to Fix Them)
Mistake #1: Using Weak Coffee
The Problem: Regular-strength coffee gets completely overpowered by milk and syrups, leaving you with a sweet milky drink with barely any coffee flavor. You’ll wonder why your version tastes nothing like the café’s bold, balanced beverage.
The Fix: Always use espresso or double-strength coffee by using twice the grounds with the same water amount. Your coffee base should taste almost too strong when sipped alone because it needs to shine through 1-2 cups of milk and sweet additions.
Mistake #2: Overheating or Boiling the Milk
The Problem: Milk that’s been boiled develops an unpleasant cooked flavor and won’t froth properly because you’ve destroyed the proteins that create foam structure. You’ll end up with a flat drink that tastes slightly burnt and has no creamy texture.
The Fix: Heat milk only to 150-160°F, watching for tiny bubbles around the edges, then immediately remove from heat. Use a thermometer the first few times until you learn what the correct temperature looks like—it should be quite hot but not painful to touch the pan.
Mistake #3: Adding Cold Milk to Hot Drinks
The Problem: This seems convenient but dramatically drops your drink temperature to lukewarm, which is the worst possible temperature for winter beverages. Nobody wants a tepid drink that’s meant to be either hot or cold.
The Fix: Always heat your milk before adding it to hot coffee drinks, or make the drink fully iced if you prefer cold. There’s no middle ground here—temperature matters enormously for enjoyment and these are meant to be steaming hot winter warmers.
Mistake #4: Using Too Much or Too Little Syrup
The Problem: Too much syrup makes drinks cloyingly sweet and masks the coffee flavor completely, while too little leaves them bland and one-dimensional. Getting the ratio wrong is the fastest way to waste ingredients and feel disappointed.
The Fix: Start with 2 tablespoons of syrup per 12-ounce drink, taste, then add more only if needed in ½ tablespoon increments. Remember you can always add more sweetness but you can’t take it away, so err on the conservative side initially until you learn your preference.
Storing Your Best Winter Drinks (Make-Ahead Guide)
These drinks are absolutely best consumed immediately while hot and freshly made, but I understand that sometimes you want to prep components ahead or save leftovers. The reality is that hot coffee drinks don’t store well once assembled because the coffee continues to extract, the milk separates, and the foam collapses, but you have options for partial preparation.
Refrigeration: Store assembled drinks in an airtight container for up to 24 hours maximum, but understand the texture will change significantly—the foam will disappear and ingredients will separate. Give it a vigorous shake or stir before reheating in the microwave in 30-second intervals. Honestly, it’s drinkable but nowhere near as good as fresh.
Make-ahead components: Brew your coffee or espresso and store it in the fridge for up to 3 days; prepare your syrup mixtures and store them in squeeze bottles in the fridge for up to 2 weeks; measure out dry ingredients like cocoa powder and spices into small containers. When you’re ready, just heat milk, froth it, and combine everything—this takes only 3-4 minutes and tastes infinitely better than reheating a pre-made drink.
Freezing options: You can freeze brewed coffee in ice cube trays for iced versions of these winter drinks, which is perfect for those days when you want peppermint mocha but it’s unseasonably warm. Don’t freeze assembled drinks—the separation is irreversible and the texture becomes grainy and unpleasant.
My personal routine is prepping all my syrups and dry mixes on Sunday evening, then making drinks fresh each morning during my 10-minute routine. This gives me convenience without sacrificing quality, and I still save the 15-20 minutes I’d spend driving to a café.
Best Winter Drinks Recipe FAQs
Can I make Best Winter Drinks ahead of time?
You can’t make the complete drinks ahead successfully, but you can prep components for quick assembly. Brew coffee up to 3 days ahead and refrigerate; prepare syrup mixtures up to 2 weeks ahead in squeeze bottles; measure spices into small containers. When ready to serve, heat and froth fresh milk and combine everything—this takes only 3-4 minutes. Fully assembled drinks deteriorate quickly as milk separates and foam collapses, becoming grainy and unappetizing after just 2-3 hours even when refrigerated. I always recommend making these drinks fresh because the 10 minutes of effort is worth the dramatically superior taste and texture.
What’s the difference between homemade Best Winter Drinks and the coffee shop version?
My homemade versions taste 95% identical to café drinks when you use quality syrups like Torani, which many coffee shops actually use themselves. The main differences are that homemade versions let you control sweetness precisely, use real ingredients without stabilizers or artificial flavors, and cost $2.50 versus $6.95 per serving. Coffee shop drinks sometimes have slightly more consistent foam because of their professional equipment, but a good handheld frother gets you incredibly close. Homemade wins for customization and cost; café wins for convenience when you’re already out, but taste-wise they’re virtually indistinguishable if you follow the recipe carefully.
Can I make Best Winter Drinks without an espresso machine?
Absolutely yes—you can use strong brewed coffee, French press, pour-over, or even instant espresso powder dissolved in hot water. The key is making concentrated coffee by using twice the normal amount of grounds or instant powder so the coffee flavor doesn’t disappear under milk and syrups. I use a Moka pot most mornings which makes incredibly strong coffee similar to espresso for a fraction of the equipment cost. The drink will taste slightly different than espresso-based versions but still delicious—you might just notice less of that bold, slightly bitter coffee punch that espresso provides.
How do I make Best Winter Drinks less sweet or fewer calories?
Cut syrup in half from 2 tablespoons to 1 tablespoon and add extra cinnamon or vanilla extract for flavor without sweetness—this reduces sugar from 38g to about 18g per serving. Switch to unsweetened almond or oat milk instead of whole milk, cutting calories from 280 to approximately 180. Use sugar-free Torani syrups which have zero calories but similar taste. Skip the whipped cream topping or use just a small dollop instead of a huge swirl, saving another 50-80 calories. My personal lower-calorie version uses oat milk, 1.5 tablespoons syrup, and no whipped cream, clocking in at about 170 calories while still tasting indulgent and satisfying.
Why doesn’t my Best Winter Drinks taste like the coffee shop’s?
The most common culprits are weak coffee that disappears under milk and sweeteners, wrong milk temperature (boiled milk tastes cooked and burnt), incorrect syrup amounts (usually too much or too little), or skipping the frothing step which adds crucial creaminess. You’re probably using regular-strength coffee when you need espresso or double-strength. Make sure you’re heating milk to 150-160°F without boiling, using exactly 2 tablespoons of quality syrup like Torani brand, and properly frothing for at least 30 seconds until the milk doubles in volume. Ingredient quality matters enormously—cheap syrups taste artificial and weak coffee simply can’t compete with milk volume, so don’t cut corners on those two elements.
Are Best Winter Drinks vegan or dairy-free?
They’re easily made vegan by substituting plant-based milk and using coconut whipped cream instead of dairy whipped cream. Oat milk is my top recommendation because it froths beautifully, adds natural sweetness, and creates that creamy mouthfeel almost identical to dairy milk. Soy milk also froths well but has a slightly beany aftertaste that some people notice. Almond milk works but produces thinner, less stable foam. Most flavored syrups including Torani are already vegan, but always check labels to be certain—the drinks themselves contain no animal products once you swap the milk and whipped cream.
How many servings does one bottle of syrup make?
A standard 750ml Torani syrup bottle makes approximately 25 drinks using 2 tablespoons (30ml) per drink, bringing your per-drink syrup cost to around $0.30-$0.40. This is one reason homemade versions save so much money—you’re buying the syrup once and using it for an entire month of daily drinks. Opened bottles last 6-12 months when stored in a cool, dark place, so there’s no waste even if you rotate through different flavors. I keep three or four different syrups on hand and switch between them based on my mood, creating variety while still saving significantly compared to buying individual café drinks.
Final Thoughts on Making Best Winter Drinks at Home
Making best winter drinks at home has genuinely changed my winter mornings, saving me over $200 per season while giving me better-tasting, customized drinks exactly when I want them. You can make any of these five recipes in 10 minutes for about $2.50 per serving compared to $6.95 at coffee shops—that’s a 64% savings without sacrificing taste or quality. The best winter drinks collection I’ve shared covers all the most popular seasonal flavors, from peppermint mocha to spiced chai, giving you café-quality beverages from your own kitchen.
I genuinely believe anyone can master these recipes regardless of cooking experience because they’re truly that simple. Don’t worry if your first attempt isn’t perfect—mine definitely wasn’t—but by your third or fourth time making these best winter drinks, you’ll have the process memorized and be creating beautiful, delicious drinks confidently. The investment in a milk frother and quality syrups pays for itself after making just 4-5 drinks, and then you’re profiting on every subsequent drink compared to café prices.
I make these winter drinks 4-5 times per week throughout cold weather months, and my family has stopped asking me to pick up café drinks entirely. Friends who visit constantly request “that peppermint mocha” or “the salted caramel thing,” and they’re shocked when I make it in my kitchen in under 10 minutes. That’s the beauty of these recipes—they look and taste impressive but require minimal skill and time.
If you tried this Best Winter Drinks recipe, please leave a star rating below and let me know how it turned out in the comments! I read every single one and love hearing about your Best Winter Drinks creations, especially which flavor became your favorite or any modifications you discovered.
Save this recipe by pinning it to Pinterest or bookmarking this page—you’ll want to make Best Winter Drinks again and again all season long!