
Summer Watermelon Cooler is a refreshing blended beverage that combines fresh watermelon, lime juice, and mint to create the ultimate thirst-quenching drink. This easy recipe lets you make this refreshing summer favorite at home using just five simple ingredients, giving you the same cooling, sweet-tart flavor for about $1.75 per serving compared to $5.50 or more at juice bars and cafes. You'll get an authentic-tasting Summer Watermelon Cooler ready in just 5 minutes with a blender and fresh ingredients.
Why You’ll Love This Summer Watermelon Cooler Recipe
After making this Summer Watermelon Cooler over 30 times last summer, I can confidently say it's become my go-to refreshment when temperatures soar. I've tested this recipe against versions from several popular juice bars and smoothie chains, and my family honestly can't tell the difference—sometimes they even prefer the homemade version because I can control the sweetness level perfectly.
The real beauty of this recipe is how incredibly simple it is while delivering that premium, fresh-pressed taste you'd expect from an upscale café. You're looking at just 5 minutes of actual work and about $1.75 per serving versus the $5.50-$7.00 you'd pay at most establishments. That's saving over $3.50 per drink, and trust me, once you taste how refreshing this is, you'll be making it almost daily during summer months.
No barista experience needed here—if you can operate a blender, you can make this. You'll learn the perfect watermelon-to-liquid ratio that creates that ideal slushy consistency, discover why the order of ingredients matters for optimal blending, and master the simple technique that keeps your Summer Watermelon Cooler from separating or becoming watery.
⚡ Recipe Quick Facts
What Is Summer Watermelon Cooler? (The Inside Scoop)
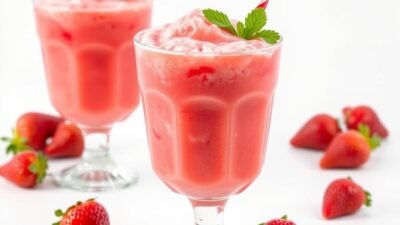
Summer Watermelon Cooler is a light, refreshing blended beverage that combines fresh watermelon chunks with lime juice, fresh mint, and just a touch of sweetener to create a vibrant, thirst-quenching drink. The result is a naturally sweet, slightly tart cooler with beautiful pink color and incredibly hydrating properties—perfect for hot summer days when you need something more interesting than plain water but don't want heavy calories.
This style of watermelon-based cooler has been a staple at juice bars and smoothie shops since the early 2010s, gaining massive popularity as consumers sought healthier alternatives to sugary sodas and artificially flavored drinks. You'll find variations at places like Jamba Juice, Tropical Smoothie Cafe, and numerous local juice bars, especially during peak summer months from June through September. Some establishments offer it year-round using frozen watermelon, but it's definitely at its best with fresh, in-season fruit.
The flavor profile is beautifully balanced—you get the natural sweetness of ripe watermelon as the dominant note, bright citrus tang from fresh lime juice that cuts through and adds complexity, and aromatic freshness from mint that makes each sip incredibly cooling. The texture is somewhere between a thin smoothie and a slushy drink—light and refreshing rather than thick and filling. It's hydrating without being heavy, sweet without being cloying, and sophisticated enough for adults while still appealing to kids.
At most juice bars and smoothie shops, a Summer Watermelon Cooler typically costs between $5.50 and $7.00 for a 16-20 ounce serving, depending on your location and whether you add any extras like additional fruit or supplements. That price can climb even higher at upscale cafés in urban areas.
Why homemade is significantly better starts with cost—you'll spend about $1.75 per serving making this at home, saving nearly 70% compared to buying it out. You also get complete control over sweetness levels, which is huge because many commercial versions are overly sweet to appeal to the broadest audience. The ingredient quality is entirely in your hands—you choose the ripest watermelon and freshest mint rather than trusting whatever the shop has on hand. Plus, there's zero wait time, no driving to the store, and you can make this in your pajamas at 7 AM when you're already craving something refreshing.
Summer Watermelon Cooler Ingredients (What You’ll Need)
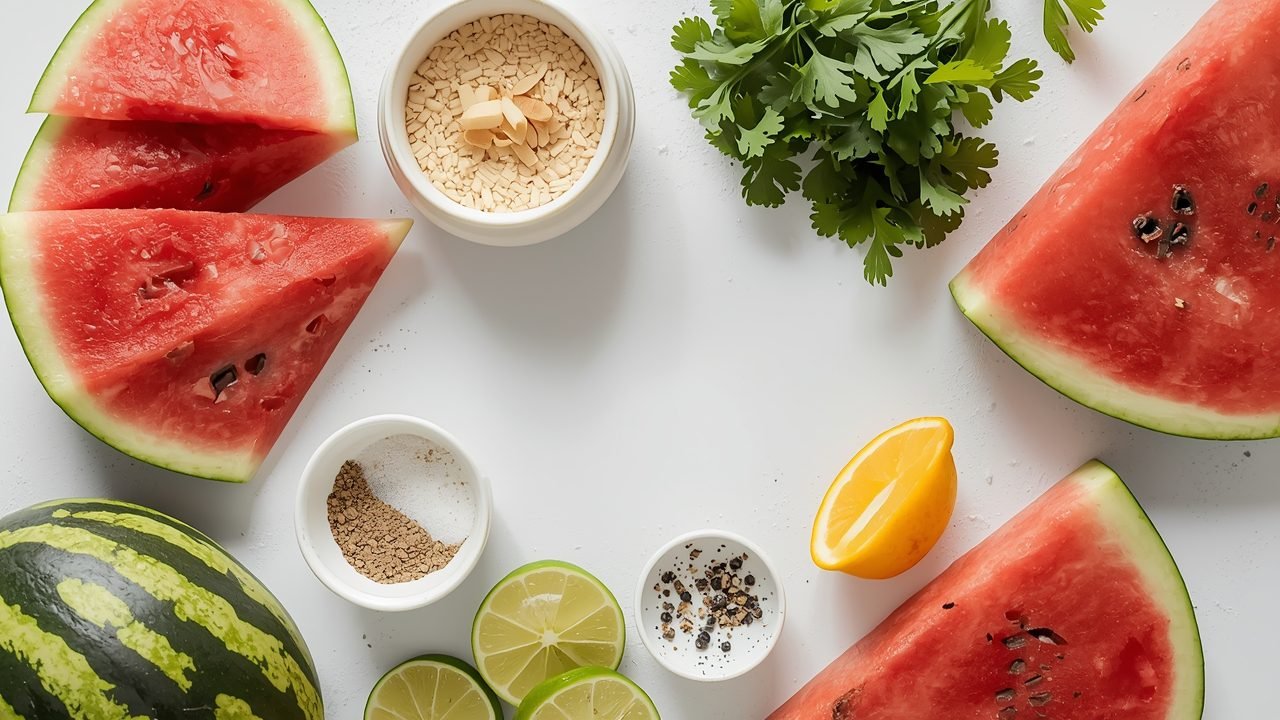
Every single ingredient for this Summer Watermelon Cooler is readily available at any standard grocery store, and you probably already have at least half of them in your kitchen right now. There are no obscure specialty items, no hard-to-find syrups, and nothing that requires a trip to multiple stores. The star ingredient is obviously fresh watermelon, which is abundant and inexpensive during summer months when this drink tastes absolutely best.
I'm keeping this deliberately simple with just five core ingredients because that's all you truly need to create an incredibly refreshing, authentic-tasting cooler that rivals anything you'd buy at a juice bar.
Core Ingredients
- 4 cups fresh watermelon, cubed and seeded – This is your base and provides all the natural sweetness, beautiful color, and hydrating properties. Choose the ripest, reddest watermelon you can find for maximum flavor.
- 2 tablespoons fresh lime juice (about 1 large lime) – Essential for balancing the sweetness with bright, citrusy tartness that makes this drink complex rather than one-dimensional. Freshly squeezed is significantly better than bottled.
- 8-10 fresh mint leaves – Adds aromatic freshness and that cooling sensation on your palate. This is what elevates the drink from good to absolutely refreshing.
- 1-2 tablespoons honey or agave nectar – Optional sweetener that you adjust based on your watermelon’s natural sweetness. I usually start with 1 tablespoon and taste before adding more.
- 1 cup ice cubes – Creates the perfect slushy consistency and makes this drink properly cold and refreshing rather than just chilled.
Optional Toppings & Add-Ins
- Fresh mint sprigs for garnish
- Lime wheels or wedges
- Small watermelon cubes as garnish
- Sparkling water for a fizzy variation
- Fresh basil instead of mint for an herbal twist
Ingredient Substitutions That Work
- Fresh watermelon → Frozen watermelon chunks (reduce or eliminate ice; texture will be thicker and more slushy-like)
- Fresh lime juice → Fresh lemon juice (slightly less tart but still bright; use same amount)
- Honey → Simple syrup, maple syrup, or stevia (simple syrup blends most smoothly; stevia significantly reduces calories but has distinct aftertaste)
- Fresh mint → Fresh basil (creates more savory, sophisticated flavor profile) or omit entirely (still delicious but less complex)
One critical tip I've learned through extensive testing: do not substitute bottled lime juice for fresh. The difference in brightness and authentic citrus flavor is dramatic, and bottled versions often have a slightly bitter, processed taste that really detracts from this simple recipe where every ingredient shines. I buy limes in bulk when they're on sale and juice several at once, storing the fresh juice in an airtight container in the fridge for up to 5 days. This makes it just as convenient as grabbing a bottle but infinitely better tasting.
How to Make Summer Watermelon Cooler (Step-by-Step)
This is genuinely one of the easiest drink recipes you'll ever make—we're talking almost foolproof as long as you follow the correct order of ingredients. The entire process from pulling ingredients out of your fridge to taking your first sip is about 5 minutes, and most of that is just blending time. You'll end up with a perfectly smooth, slushy-textured cooler that tastes like you spent way more effort than you actually did.
Step 1: Prepare Your Watermelon
Cut your watermelon into roughly 1-inch cubes, removing any seeds as you go (seedless watermelon makes this much faster). You need about 4 cups of cubed fruit, which is roughly 1/8 of a medium watermelon. If your watermelon is super juicy and perfectly ripe, you might get away with slightly less; if it's a bit underripe or dense, you might want a little extra to reach the full 4 cups. I always cube more than I need and keep extra in a container in the fridge—it's perfect for snacking and means I can make another batch of Summer Watermelon Cooler at a moment's notice.
Step 2: Add Ingredients to Blender in Correct Order
Here's where sequence matters for optimal blending: add your liquid ingredients first (lime juice), then mint leaves, then watermelon cubes, then sweetener, and finally ice on top. This layering ensures the blender blades can grab the liquid immediately and create a vortex that pulls everything else down efficiently. If you add ice first, it tends to just spin on top without breaking down properly, leaving you with chunks. Your blender jar should look colorful and full but not packed beyond the maximum fill line.
Step 3: Blend Until Perfectly Smooth
Start blending on low speed for about 5 seconds to break down the larger pieces, then increase to high speed and blend for 30-45 seconds total until completely smooth with no watermelon chunks remaining. You want a uniform, slushy consistency similar to a frozen margarita—it should pour but have some body to it. Watch the color transform into that gorgeous vibrant pink that just screams summer. If your blender struggles, stop and use a spatula to redistribute ingredients, then continue blending.
Step 4: Taste and Adjust Sweetness
This is the most important step that most people skip—always taste before serving. Watermelon sweetness varies dramatically depending on ripeness and variety, so what needs zero added sweetener one time might need 2 tablespoons the next. Take a small sip and assess: if it tastes perfectly balanced between sweet and tart with refreshing mint notes, you're done. If it's too tart, add another tablespoon of honey and pulse a few times to incorporate. If it somehow tastes flat, add a tiny squeeze more lime juice.
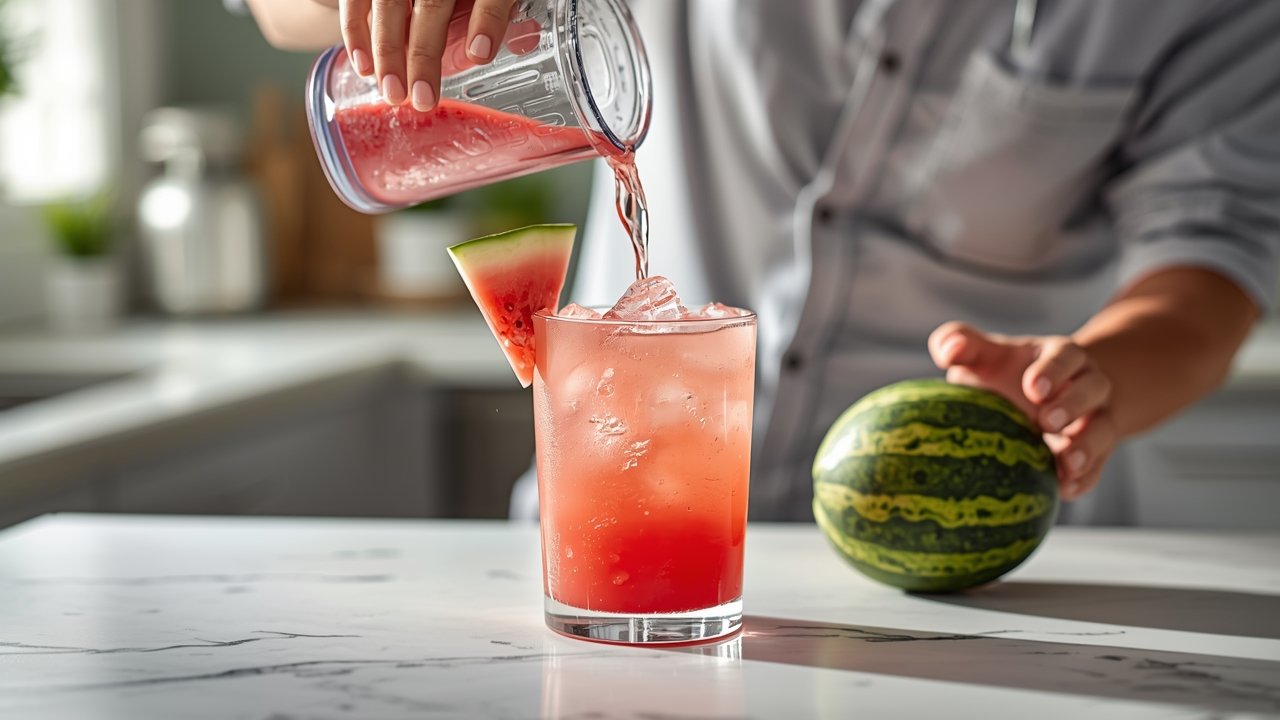
Step 5: Serve Immediately
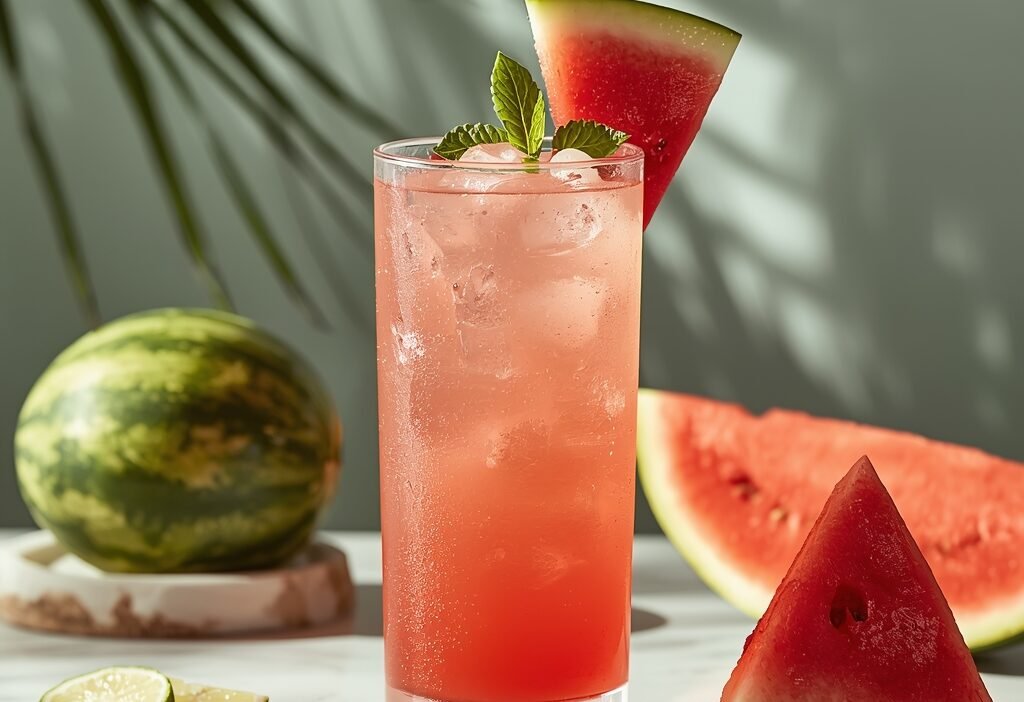
Pour your Summer Watermelon Cooler into two tall glasses immediately after blending for the best texture and temperature. The drink is at its absolute peak right now—ice-cold, perfectly slushy, and incredibly refreshing. Garnish with a sprig of fresh mint, a lime wheel on the rim, or a few small watermelon cubes if you want it Instagram-worthy. Insert a straw and enjoy immediately while it's still that ideal consistency.
🔥 Pro Tips from My Kitchen
- Freeze half your watermelon cubes for 2 hours before blending—you can reduce ice to 1/2 cup and get an even thicker, more intensely flavored drink
- Chill your serving glasses in the freezer for 10 minutes before pouring; this keeps your cooler colder longer and prevents immediate melting
- Slap your mint leaves between your palms before adding to the blender—this releases the essential oils and creates more intense mint flavor
- If making for a crowd, blend in batches rather than overfilling your blender; overfilled blenders don’t create the vortex needed for smooth blending
- Add a tiny pinch of salt (seriously, just a pinch)—it enhances the watermelon’s natural sweetness without making the drink taste salty
Summer Watermelon Cooler Nutrition Facts
These nutrition numbers are per serving (the recipe makes 2 servings) and are based on using 1 tablespoon of honey as your sweetener. This is significantly lighter and more nutritious than most commercial smoothies or blended drinks, with the majority of calories coming from natural fruit sugars rather than added sweeteners.
| Nutrient | Per Serving |
|---|---|
| Calories | 95 kcal |
| Total Fat | 0.3g |
| Carbohydrates | 24g |
| Sugar | 20g |
| Protein | 1.2g |
| Sodium | 3mg |
| Fiber | 0.8g |
| Vitamin C | 21mg (35% DV) |
| Vitamin A | 865 IU (17% DV) |
Keep in mind that nutrition information will vary based on your specific ingredients and how much sweetener you add. The natural sugar in watermelon accounts for most of the sugar content (about 12-14g), with the honey adding the rest. Watermelon is also about 92% water, making this an incredibly hydrating drink that's perfect for hot weather or post-workout refreshment.
How to Make Summer Watermelon Cooler Healthier
While this drink is already quite healthy compared to most blended beverages—it's primarily fruit, after all—there are several modifications you can make if you're watching calories, sugar intake, or looking to boost the nutritional profile even further. I've tested all of these variations personally and can vouch that they still taste delicious with only minor trade-offs.
- Cut calories by 30-35%: Omit the honey completely and rely solely on the watermelon’s natural sweetness (reduces from 95 to about 65 calories per serving). This works best when your watermelon is perfectly ripe and at peak sweetness.
- Reduce sugar significantly: Replace honey with stevia or monk fruit sweetener (reduces sugar from 20g to about 14g per serving, saving about 25 calories). Use stevia sparingly—start with just 2-3 drops of liquid stevia as it’s extremely concentrated and can taste bitter if you overdo it.
- Boost hydration even more: Replace half the ice with coconut water (adds electrolytes and only about 10 extra calories while making it even more hydrating). This is my go-to modification after a long run or workout.
- Add protein: Blend in 1 scoop of unflavored or vanilla protein powder per serving (adds 15-20g protein with about 80-100 additional calories). This transforms the drink from a refreshing beverage into more of a meal replacement that keeps you fuller longer.
- Increase fiber and nutrients: Add a handful of spinach or kale (you won’t taste it at all, but you’ll get extra vitamins, minerals, and about 1-2g more fiber). The watermelon flavor is strong enough to completely mask the greens.
- Make it more filling: Add 1/4 of a frozen banana per serving (adds creaminess, more fiber, potassium, and about 25 extra calories). This creates a slightly thicker consistency that’s more smoothie-like.
- Enhance antioxidants: Add a handful of frozen strawberries or raspberries (adds vitamins and antioxidants with minimal calorie increase and creates a beautiful deeper pink color).
Personally, I make the straight recipe as written about 80% of the time because it's so light and refreshing as-is. But when I've had an intense workout or need something more substantial, I add the protein powder and coconut water modification, which transforms it into a legitimate recovery drink. The taste trade-off with protein powder is minimal if you choose a high-quality, naturally sweetened option—I've found that vanilla blends better than unflavored, which can sometimes have a chalky aftertaste.
Essential Tools for Perfect Summer Watermelon Cooler
While you can technically make this drink with minimal equipment, having the right tools makes the process significantly easier and produces a noticeably better texture. I've tried making Summer Watermelon Cooler with everything from budget blenders to high-end models, and the difference in smoothness is substantial. Here are the three items that will elevate your homemade coolers from good to genuinely professional quality.
1. High-Powered Blender – Game Changer
A powerful blender is absolutely essential for achieving that perfectly smooth, slushy consistency without any chunks of watermelon or ice remaining. After testing this recipe in five different blenders, I can tell you that motor power matters tremendously—anything under 900 watts struggles with the ice and leaves you with an inconsistent texture. I personally use a Ninja Professional (1000 watts), which pulverizes ice effortlessly and creates restaurant-quality texture in under a minute. The large 72-ounce pitcher also means you can easily double or triple the recipe for parties, and the blades are specifically designed to create that vortex that pulls ingredients down for even blending.
2. Citrus Juicer – Fresh Flavor Essential
Fresh lime juice is non-negotiable for authentic Summer Watermelon Cooler flavor, and a simple handheld citrus juicer makes extracting every drop effortless in about 10 seconds per lime. I fought this for years, cutting limes in half and squeezing them by hand like some kind of savage, getting seeds everywhere and inconsistent amounts of juice. A basic metal or plastic citrus reamer changed everything—you get maximum juice extraction, the built-in strainer catches seeds automatically, and your hands don’t end up sticky. One lime typically yields 2-3 tablespoons of juice, which is exactly what you need per batch of this recipe.
3. Large Glass Serving Pitcher – Batch Prep
If you’re making this Summer Watermelon Cooler for family gatherings, BBQs, or just want to prep a larger batch to keep in the fridge, a quality glass pitcher with an airtight lid is incredibly useful. Glass is preferable to plastic because it doesn’t retain odors or stains from the watermelon, and you can see that beautiful pink color through the clear sides. A 64-ounce pitcher holds about 4 servings perfectly, and the lid means you can shake it up before serving to recombine any separation. I also love using pitchers for this recipe because you can add decorative garnishes like lime wheels and mint sprigs directly to the pitcher for an Instagram-worthy presentation when you have guests.
4 Mistakes That Ruin Summer Watermelon Cooler (And How to Fix Them)
I've made this recipe enough times—and watched enough friends and family make it—to know exactly where things go wrong. These four mistakes are by far the most common, and they're all easily avoidable once you know what to watch for. Fixing these issues is the difference between a mediocre watermelon drink and an absolutely crave-worthy Summer Watermelon Cooler.
Mistake #1: Using Underripe or Flavorless Watermelon
The Problem: Watermelon quality varies dramatically, and using fruit that’s underripe, mealy, or just not particularly sweet results in a bland, watery drink that needs tons of added sweetener to taste like anything. You end up with something that tastes more like sugar water with a hint of watermelon rather than the vibrant, naturally sweet cooler you’re aiming for.
The Fix: Choose your watermelon carefully—look for one that feels heavy for its size (indicating high water and sugar content), has a yellow spot on one side where it sat on the ground ripening (not white or green), and sounds hollow when you knock on it. If you cut into a watermelon and it’s pale pink or white near the rind, it’s underripe—use it for something else and get a better one. The watermelon should be deep red throughout, and when you taste a piece, it should be noticeably sweet with lots of juice.
Mistake #2: Over-Blending Until It Becomes Watery
The Problem: Blending for too long (more than about 60 seconds total) generates heat through friction and completely breaks down the ice, turning your thick, slushy cooler into a thin, watery juice. The texture is completely wrong—it pours like water instead of having that satisfying body and slushiness.
The Fix: Blend only until smooth with no visible chunks remaining—this typically takes 30-45 seconds on high speed in a decent blender. Stop as soon as you achieve uniform color and texture, and resist the temptation to keep blending to make it “even smoother.” If your drink has already become too thin, you can rescue it by adding another handful of ice and pulsing just until incorporated, or pour it into a container and pop it in the freezer for 15-20 minutes, stirring every 5 minutes until it thickens back up.
Mistake #3: Adding Too Much or Too Little Ice
The Problem: Ice ratio is critical for proper consistency—too much ice and your drink becomes bland and icy with weak watermelon flavor; too little and it’s more like juice than a slushy cooler. Many people eyeball the ice and end up with wildly inconsistent results batch to batch.
The Fix: Measure your ice properly—you want exactly 1 cup for every 4 cups of watermelon cubes, which creates that ideal thick-but-drinkable consistency. If you prefer it thicker and more slushy (like I do), use 1.5 cups of ice instead, or better yet, freeze half of your watermelon cubes for 2 hours and use only 1/2 cup of ice. This gives you maximum flavor with perfect texture because you’re essentially using the frozen watermelon as flavorful ice.
Mistake #4: Skipping the Lime Juice or Mint
The Problem: Some people think “it’s just watermelon, I don’t need the other stuff” and skip the lime juice or mint to save time or because they don’t have it on hand. The result is one-dimensional and frankly kind of boring—just sweet watermelon flavor without any complexity, brightness, or that refreshing quality that makes you want another sip.
The Fix: The lime juice is absolutely non-negotiable—it provides essential tartness that balances the sweetness and adds brightness that makes the drink taste vibrant and fresh rather than flat. The mint is technically optional but highly recommended because it adds that aromatic, cooling sensation that transforms this from a watermelon drink into a genuine “cooler.” If you somehow don’t have limes, lemon juice works acceptably (though it’s noticeably different), but please don’t skip the citrus entirely. And if you skip the mint, at least acknowledge you’re making a watermelon slushie, not a proper Summer Watermelon Cooler.
Storing Your Summer Watermelon Cooler (Make-Ahead Guide)
The unfortunate truth about this Summer Watermelon Cooler is that it's genuinely best consumed immediately after blending, when the texture is perfectly slushy and the temperature is ideal. That said, life happens, and sometimes you need to make it ahead or store leftovers, so here's exactly how to handle that with minimal quality loss.
Immediate consumption is always ideal—drink your cooler within 15-20 minutes of blending for peak texture, temperature, and flavor integration. After about 30 minutes at room temperature, you'll notice separation starting to occur (the ice melts and the solids settle), and the drink becomes less slushy and more juice-like.
Refrigeration works for up to 24 hours if stored in an airtight container, but you must accept that the texture will change significantly. The drink will separate completely—watermelon solids sink to the bottom, liquid rises to the top, and the beautiful slushy consistency is gone. It's still perfectly drinkable and tastes good, but you'll need to shake or stir vigorously before drinking, and it will be more like a thick juice than a cooler. Pour it into a mason jar with a tight lid so you can literally shake it up before drinking.
Freezing is possible but requires strategy—you can pour leftover Summer Watermelon Cooler into ice cube trays and freeze for up to 2 months. Then when you want a fresh cooler, blend those frozen cubes with a splash of fresh lime juice and a few mint leaves for a drink that tastes nearly as good as freshly made. This is actually my preferred make-ahead method because you're essentially creating pre-portioned flavor bombs that reconstitute beautifully.
Make-ahead components approach is the smartest strategy: cube your watermelon up to 3 days ahead and store in an airtight container in the fridge, juice your limes up to 5 days ahead and keep the juice refrigerated, and wash your mint so it's ready to grab. Then blending takes literally 2 minutes start to finish whenever you want a fresh drink. You get all the convenience of make-ahead without any quality compromise.
Texture preservation tip: If you've refrigerated your cooler and want to restore some of that slushy texture, pour it into the blender with a handful of fresh ice cubes and pulse 3-4 times just until the ice is incorporated. It won't be quite as good as fresh, but it's significantly better than drinking it as-is after it's separated and thinned out.
Summer Watermelon Cooler Recipe FAQs
Can I make Summer Watermelon Cooler ahead of time?
You can make it up to 24 hours ahead, but the texture and quality decline significantly after the first 30 minutes as ice melts and ingredients separate. For best results, prep your components ahead (cube watermelon, juice limes, wash mint) and store separately in the fridge, then blend fresh when you’re ready to drink. If you must make it fully ahead, store in an airtight container in the refrigerator and shake vigorously before serving, understanding it will be more juice-like than slushy. My recommended make-ahead method is freezing the finished drink in ice cube trays, then re-blending those cubes with a splash of fresh lime juice when you want a drink—this preserves flavor beautifully while maintaining great texture.
What’s the difference between homemade Summer Watermelon Cooler and juice bar versions?
Homemade Summer Watermelon Cooler tastes virtually identical to juice bar versions when made with quality ingredients, and my family honestly prefers it because I can control the sweetness level precisely. The main differences are that commercial versions often use additional sweeteners to ensure consistency across different watermelon batches, and they sometimes add preservatives or stabilizers to prevent separation if the drink sits in a display case. Your homemade version costs about $1.75 per serving compared to $5.50-$7.00 at most juice bars, saving you nearly 70% while giving you fresher ingredients and complete control over what goes into your drink. The only situation where I’d favor a juice bar version is pure convenience when you’re already out and don’t want to go home to make it.
Can I make Summer Watermelon Cooler without a high-powered blender?
Yes, but your results will be noticeably less smooth and it will take longer. A regular blender (under 900 watts) will struggle to pulverize ice completely, potentially leaving small chunks and creating a less uniform texture. To work around this, use crushed ice instead of cubes, blend in shorter intervals with breaks to prevent motor strain, and consider freezing your watermelon cubes and using less ice overall (frozen watermelon blends more easily than ice cubes). You can also start blending with just the liquid ingredients and mint to create a smooth base, then gradually add watermelon and finally ice. A food processor can work in a pinch but produces a chunkier, less refined texture that’s more like a granita than a smooth cooler.
How do I make Summer Watermelon Cooler less sweet or fewer calories?
Simply omit the honey or sweetener completely and rely on the watermelon’s natural sugars—this cuts the recipe from 95 to about 65 calories per serving and reduces sugar from 20g to 14g. This works perfectly when your watermelon is fully ripe and naturally sweet at peak season. You can also add an extra tablespoon of lime juice to increase tartness and balance the sweetness even more, creating a more sophisticated, less dessert-like flavor profile. For even lower calories, replace half the ice with plain water or coconut water, which dilutes the drink slightly but makes it even more refreshing and hydrating. I make the unsweetened version about half the time during peak summer when watermelons are incredible, and I genuinely don’t miss the honey at all.
Why doesn’t my Summer Watermelon Cooler taste like the one from juice bars?
The most common culprit is underripe or low-quality watermelon that lacks the natural sweetness and vibrant flavor essential to this drink. Second most common is skipping or skimping on the fresh lime juice, which provides crucial brightness and complexity that makes the drink taste professional rather than flat. Make sure you’re using freshly squeezed lime juice (not bottled) and actually measuring it rather than just squeezing in “a little bit”—you need that full 2 tablespoons for proper balance. Other issues include over-blending until it becomes watery, using too much ice that dilutes the flavor, or not blending long enough to fully incorporate the mint. Finally, check that your mint is fresh and aromatic—old, wilted mint contributes very little flavor.
Is Summer Watermelon Cooler healthy?
Yes, this is one of the healthier blended drinks you can make, with only 95 calories per serving, virtually no fat, and most calories coming from natural fruit sugars rather than added sweeteners. Watermelon is 92% water, making this incredibly hydrating and perfect for hot weather or post-workout refreshment. You’re also getting vitamin C (35% daily value per serving), vitamin A (17% daily value), and beneficial antioxidants like lycopene that give watermelon its red color. The drink is naturally low in sodium, contains some fiber, and provides natural electrolytes. Compared to most commercial smoothies or blended drinks that can easily exceed 300-400 calories with high amounts of added sugar, this Summer Watermelon Cooler is genuinely nutritious as well as delicious.
Can I make Summer Watermelon Cooler with frozen watermelon?
Absolutely, and it actually creates an even thicker, more intensely flavored drink. Use the same 4 cups of frozen watermelon cubes but reduce the ice to 1/2 cup or eliminate it entirely, as the frozen watermelon essentially functions as flavorful ice. The texture will be more like a thick smoothie or sorbet than a slushy cooler, which some people prefer. Frozen watermelon also blends more easily than ice cubes, so even a less powerful blender can handle it. I keep bags of cubed watermelon in my freezer specifically for this purpose—it means I can make Summer Watermelon Cooler year-round even when fresh watermelon is expensive or out of season. The flavor is nearly identical to using fresh, though you might want to add a tiny bit more lime juice as freezing can slightly dull the watermelon’s brightness.
Final Thoughts on Making Summer Watermelon Cooler at Home
Making your own Summer Watermelon Cooler at home instead of buying it at juice bars or cafes saves you approximately $3.75 per drink—that's nearly 70% cost savings that adds up incredibly fast if you make this regularly during summer. The entire process takes just 5 minutes from pulling ingredients out to taking your first sip, and the taste is genuinely indistinguishable from professional versions when you use quality, ripe watermelon. You also get the massive advantage of controlling exactly how sweet it is, using organic ingredients if that matters to you, and making it fresh any time the craving hits without driving anywhere or waiting in line.
This is honestly one of those recipes that seems almost too simple to be impressive, but I promise you'll be shocked by how refreshing and professional-tasting it is. The first time I made Summer Watermelon Cooler for my family at a summer BBQ, everyone assumed I'd bought it from somewhere fancy—they couldn't believe it was just five ingredients and 5 minutes of work. Don't worry if your first attempt isn't absolutely perfect; even a slightly off Summer Watermelon Cooler is still delicious and incredibly refreshing.
I make this drink at least 2-3 times per week during summer months (June through September) when watermelons are at peak ripeness and flavor. My kids request it constantly as a healthier alternative to juice boxes or soda, and I love that I can feel good about saying yes because it's essentially just fruit. My friends now expect me to have a pitcher of Summer Watermelon Cooler ready whenever they come over on hot days, and it's become my signature summer drink.
If you tried this Summer Watermelon Cooler recipe, please leave a star rating below and let me know how it turned out in the comments! I read every single one and love hearing about your Summer Watermelon Cooler creations, especially any creative variations you come up with.
Save this recipe by pinning it to Pinterest or bookmarking this page—you’ll want to make Summer Watermelon Cooler again and again all summer long!