
This copycat McDonald’s Shamrock Shake recipe is about to become your new favorite St. Patrick’s Day tradition, and at just $1.50 per serving compared to the $4+ you’ll pay at the drive-thru, your wallet will thank you too. I’ve spent years perfecting this recipe to capture that exact creamy, minty flavor that makes the original so irresistible, and I’m thrilled to share all my secrets with you. You’ll learn not only how to nail the perfect mint-to-vanilla ratio, but also how to customize this iconic green treat to your exact preferences, plus storage tips that’ll let you enjoy this seasonal favorite any time of year.
Why You’ll Love This Recipe
The magic of this homemade Shamrock Shake lies in its perfect balance of cool mint and creamy vanilla that tastes exactly like the McDonald’s version, but with ingredients you can actually pronounce. I’ve tested this recipe against the original countless times, and even my pickiest friends can’t tell the difference – except that mine tastes fresher and doesn’t leave that artificial aftertaste some people notice with the fast-food version. The best part is that you control the intensity of the mint flavor, so whether you prefer a subtle hint or a bold peppermint punch, you can adjust it to your liking.
Let’s talk about the cost savings for a moment because they’re honestly incredible. A large Shamrock Shake at McDonald’s typically runs between $4.29 and $4.89 depending on your location, and that’s if you can even find one during the limited seasonal window. With this recipe, you’re looking at approximately $1.50 per serving for a generous 16-ounce shake, and that’s using premium ice cream. Over the course of March alone, if you’re like me and crave these at least twice a week, you’re saving over $20 – enough to buy all the ingredients to make them year-round!
What really sets this recipe apart from other copycat versions I’ve tried is the texture. So many homemade versions end up too thin or too thick, but I’ve discovered the exact ice cream to milk ratio that creates that signature McDonald’s consistency – thick enough to coat your straw but smooth enough to sip easily. Plus, unlike the original that’s only available for about six weeks each year, you can whip this up whenever a craving strikes, whether it’s a hot July afternoon or a cozy December evening.
The customization possibilities are where this recipe really shines compared to the drive-thru version. Want to make it dairy-free? I’ve got you covered. Looking to cut back on sugar? There’s a variation for that. Feeling adventurous and want to add a shot of Bailey’s for an adult version? Absolutely doable. You can even adjust the color intensity from a subtle pastel green to a vibrant emerald that would make any leprechaun jealous.
Perhaps my favorite thing about making this at home is how quick and easy it is – we’re talking five minutes from craving to first sip. No need to get dressed, drive to McDonald’s, wait in line, and hope they haven’t run out for the day. With just a blender and a few simple ingredients you probably already have on hand, you can satisfy that Shamrock Shake craving faster than you could even make it through the drive-thru line.
What You’ll Need
The Base
The foundation of any great mint milkshake recipe starts with high-quality vanilla ice cream, and I always recommend using a premium brand like Häagen-Dazs or Ben & Jerry’s vanilla because the richer the ice cream, the creamier your shake will be. You’ll want to let it soften slightly on the counter for about five minutes before blending – this prevents those annoying ice cream chunks and gets everything to blend smoothly. If you’re looking for a lighter option, vanilla frozen yogurt works beautifully too, though you might need to add a touch more milk to get the right consistency.
The Liquid Component
Whole milk is my go-to for getting that authentic McDonald’s texture, but the beauty of making your own is that you can use whatever milk suits your dietary needs. I’ve successfully made this with 2% milk for a slightly lighter version, and even almond or oat milk for dairy-free friends, though coconut milk adds an interesting tropical twist that some people absolutely love. The key is to start with less liquid than you think you need – you can always add more, but you can’t take it away once your shake is too thin.
The Mint Magic
This is where the real secret lies – pure peppermint extract, not mint extract, is what gives you that authentic Shamrock Shake flavor. There’s a subtle but important difference between the two, with peppermint being cooler and more refreshing while spearmint tends to be sweeter and less intense. I always use McCormick or Simply Organic brand because cheap extracts can taste artificial and ruin the whole shake. Start with less than you think you need because peppermint extract is potent stuff, and you can always add more to taste.
The Color
While the vibrant green color doesn’t affect the taste, it’s essential for that authentic St Patrick’s Day shake experience. I prefer using gel food coloring because it’s more concentrated, so you need less, and it won’t water down your shake like liquid food coloring can. Look for a true green or mix blue and yellow to get the perfect shade – aim for a mint green rather than a neon green for the most authentic look. If you’re trying to avoid artificial colors, spirulina powder or a tiny bit of spinach (trust me, you won’t taste it) can give you a natural green tint.
The Finishing Touches
Whipped cream is non-negotiable for the full McDonald’s experience, and while canned whipped cream works in a pinch, homemade whipped cream takes this shake to the next level. I like to add a tiny drop of peppermint extract to my whipped cream for an extra layer of minty goodness. Don’t forget the maraschino cherry on top – it might seem like a small detail, but it’s these little touches that make your homemade version feel just as special as the original.
Pro Tips Before You Start
- Temperature is everything: Your ice cream should be soft enough to scoop easily but not melting. If it’s too hard, your blender will struggle and you’ll end up adding too much milk to compensate. If it’s too soft, your shake will be thin and disappointing. I set my ice cream on the counter exactly 5 minutes before I start making the shake – set a timer because it makes a difference!
- Blend in stages for the perfect texture: Start by pulsing the ice cream and milk together just until combined, then add your peppermint extract and food coloring. This prevents over-blending, which can make your shake too thin and introduce too much air, resulting in a foamy rather than creamy texture.
- Use a powerful blender if possible: While you can make this in any blender, a high-powered one like a Vitamix or Blendtec will give you the smoothest, creamiest results. If you’re using a standard blender, cut your ice cream into chunks first to help it blend more easily and prevent motor strain.
- Chill your glasses in the freezer: This might seem like an unnecessary step, but a frosty glass keeps your shake cold longer and prevents it from melting too quickly. I keep a few glasses in my freezer specifically for milkshakes and smoothies – 15 minutes is all you need for that perfect frosty chill.
- Measure your peppermint extract carefully: This is the number one mistake I see people make – dumping in peppermint extract like it’s vanilla. Peppermint is incredibly potent, and too much will make your shake taste like toothpaste. I always measure it properly and taste before adding more.
- Don’t skip the food coloring: I know some people are hesitant about artificial colors, but that green hue is part of what makes a Shamrock Shake special. If you’re really opposed to food coloring, at least make it for others with the color – the joy on their faces when they see that perfect green shake is worth it!
- Make your whipped cream while the ice cream softens: This is a great time-saver that gets everything ready at the same time. Homemade whipped cream only takes about 3 minutes to make and stays perfect in the fridge while you blend your shake.
- Clean your blender immediately: Trust me on this one – dried mint shake residue is surprisingly difficult to clean. A quick rinse with hot soapy water right after pouring your shake will save you scrubbing time later.
How To Make Copycat McDonald’s Shamrock Shake – The Perfect Homemade Recipe
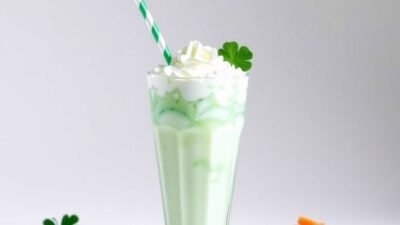
Creating this copycat McDonald’s Shamrock Shake at home is surprisingly simple and incredibly satisfying. You’ll start by letting your premium vanilla ice cream soften just enough to blend smoothly, then combine it with whole milk in your blender for that perfect creamy base. The magic happens when you add just the right amount of peppermint extract – enough to give you that refreshing mint flavor without overwhelming your taste buds. A few drops of green food coloring transform your shake into that iconic St. Patrick’s Day treat, and a final blend brings everything together into the smooth, creamy perfection you remember from McDonald’s. Top it off with a generous swirl of whipped cream and a bright maraschino cherry, and you’ve got a homemade Shamrock Shake that rivals – or dare I say surpasses – the original.
Copycat McDonald's Shamrock Shake - The Perfect Homemade Recipe
Ingredients
Equipment
Method
- Let the vanilla ice cream sit at room temperature for 3-4 minutes to soften slightly. The ice cream should be soft enough to scoop easily but not melted - this ensures a thick, creamy shake texture rather than a thin, icy one.
- Add the softened vanilla ice cream to your blender first, followed by the cold whole milk. Starting with ice cream at the bottom helps the blender blades grip and blend more efficiently, preventing chunks of unblended ice cream.
- Add the peppermint extract to the blender, being careful not to add too much as peppermint flavor intensifies quickly. Start with 1/4 teaspoon - you can always add more, but you can't take it away once it's too strong.
- Add 6 drops of green food coloring to start, which will give you that signature pale green Shamrock Shake color. The shade should be a soft mint green, not dark or artificial looking - add more drops one at a time if needed.
- Secure the blender lid tightly and blend on medium speed for 30-45 seconds until the mixture is completely smooth and creamy. You should hear the motor change to a steady whir when everything is fully incorporated, with no ice cream chunks remaining.
- Stop the blender and check the consistency - it should coat the back of a spoon and slowly drip off, similar to a thick smoothie. If it's too thick, add 1-2 tablespoons more milk and blend for 10 more seconds.
- Pour the shake into a tall glass, leaving about an inch of space at the top for whipped cream if desired. The shake should pour in a steady, thick stream - if it's too thin, you can pop it in the freezer for 5 minutes to thicken up.
- Top with a generous swirl of whipped cream and place a maraschino cherry on top for the classic McDonald's presentation. Serve immediately with a wide straw while the shake is still cold and thick for the best flavor and texture experience.
Customizations & Variations
Dairy-Free Delight
For my lactose-intolerant friends who’ve been missing out on this green mint shake goodness, I’ve perfected a dairy-free version that’s just as creamy and delicious as the original. Use your favorite non-dairy vanilla ice cream (I’m partial to So Delicious cashew milk or Ben & Jerry’s non-dairy vanilla) combined with unsweetened almond milk or oat milk for the best results. The key is to use full-fat coconut cream for your whipped topping – whip it just like regular cream with a touch of powdered sugar and vanilla, and no one will know the difference. This version actually has a subtle richness that some people prefer to the original!
Sugar-Free Sensation
If you’re watching your sugar intake but still want to indulge in this St. Patrick’s Day favorite, I’ve got you covered with a version that doesn’t sacrifice any flavor. Start with a no-sugar-added vanilla ice cream like Enlightened or Rebel, and use unsweetened almond milk as your liquid base. The peppermint extract is naturally sugar-free, so you’re already ahead of the game there. For the whipped cream, use heavy cream whipped with a sugar-free sweetener like erythritol or stevia – just remember that some sugar substitutes can leave an aftertaste, so taste as you go and adjust accordingly.
Mint Chocolate Chip Marvel
This variation takes the classic Shamrock Shake and elevates it with chocolate, because let’s be honest, mint and chocolate are a match made in heaven. After blending your base shake, pulse in some mini chocolate chips or cacao nibs for delightful chocolatey bursts in every sip. I sometimes drizzle chocolate syrup around the inside of the glass before pouring in the shake for an extra special presentation. For the ultimate indulgence, top with chocolate whipped cream (just add cocoa powder to your regular whipped cream recipe) and garnish with chocolate shavings.
Protein-Packed Power Shake
For my fitness-focused friends who want to enjoy a Shamrock Shake without derailing their nutrition goals, this protein-packed version is a total winner. Replace half of the ice cream with vanilla Greek yogurt and add a scoop of vanilla protein powder to boost the protein content significantly. The Greek yogurt actually makes the shake even creamier while adding beneficial probiotics, and the protein powder helps balance out the sugar content. This version keeps you satisfied longer and makes a great post-workout treat that doesn’t feel like a compromise.
Boozy Shamrock Shake
When you want to make your St. Patrick’s Day celebration a little more adult, this spiked version is absolutely incredible. Add a shot of vanilla vodka or Irish cream liqueur like Bailey’s to your standard recipe for a delightful grown-up twist. For an extra special touch, I like to rim the glass with vanilla frosting and crushed mint cookies before pouring in the shake. The alcohol doesn’t freeze, so this version is best enjoyed immediately – not that lasting long has ever been a problem with this delicious variation!
Mini Shamrock Shake Shots
Perfect for parties or when you want just a taste of minty sweetness, these mini versions are adorable and portion-controlled. Make your regular shake recipe but serve it in shot glasses topped with a tiny dollop of whipped cream and a sprinkle of green sanding sugar. These are especially popular at St. Patrick’s Day parties, and kids love having their own “grown-up” sized drinks. I’ve found that making these ahead and keeping them in the freezer creates an almost soft-serve consistency that people absolutely love.
Shamrock Shake Float
This fun twist combines the best of a root beer float with our beloved mint shake by adding a scoop of vanilla ice cream on top of your finished shake. Pour your shake about three-quarters full in a tall glass, then gently place a scoop of ice cream on top and watch it slowly melt into the shake, creating beautiful green and white swirls. For extra pizzazz, add a splash of club soda or ginger ale for some fizz – it sounds weird but trust me, the combination of creamy, minty, and fizzy is surprisingly delightful.
Coffee Shop Shamrock Frappé
For those who can’t choose between their coffee addiction and their love of Shamrock Shakes, why not have both? This caffeinated version incorporates cold brew coffee or espresso into the mix, creating something similar to McDonald’s frappé drinks but with that distinctive mint flavor. Use less milk than usual and add a shot or two of strong cold coffee along with your other ingredients. The coffee doesn’t overpower the mint but adds a sophisticated depth that makes this feel like a specialty coffee shop creation.
Shamrock Shake Smoothie Bowl
Transform your shake into a trendy smoothie bowl by using less liquid to create a thicker consistency that you can eat with a spoon. Pour your extra-thick shake into a bowl and top with granola, fresh mint leaves, white chocolate chips, and a drizzle of honey for an Instagram-worthy breakfast or snack. This version feels more substantial and less indulgent while still delivering all that minty goodness we crave. I love making these on weekend mornings when I want something special but don’t want to feel like I’m having dessert for breakfast.
Shamrock Hot Chocolate
For those cold March days when a frozen shake doesn’t sound appealing, this warm version delivers all the Shamrock flavor in a cozy mug. Heat your milk gently on the stove, whisk in white chocolate chips until melted, then add your peppermint extract and green food coloring. Top with whipped cream and crushed peppermint candies for a festive touch. This variation proves that the Shamrock flavor profile isn’t just for frozen treats – it’s equally delicious warm!
Storing & Make-Ahead Tips
While Shamrock Shakes are definitely best enjoyed fresh, I understand the desire to make a big batch and save some for later, especially when you’ve perfected your homemade Shamrock Shake recipe. If you must store leftover shake, pour it into an airtight container (I prefer mason jars because they seal well and are the perfect single-serving size) and place it in the freezer, not the refrigerator. In the fridge, the shake will separate and become watery within hours, but in the freezer, it transforms into a soft-serve consistency that’s actually quite delightful. When you’re ready to enjoy it, let it sit at room temperature for about 10-15 minutes until it’s soft enough to stir, then give it a good mix to restore the creamy texture.
For the ultimate make-ahead strategy, I recommend prepping shake “kits” instead of making the full shake in advance. Measure out your ice cream into individual containers (I use small freezer-safe containers or even zip-top bags), and store them in the freezer with labels indicating how much milk and peppermint extract to add. You can even pre-mix your peppermint extract with a tiny bit of milk in ice cube trays, creating flavor cubes that you can just pop into the blender with your ice cream and remaining milk. This method means you can have a fresh Shamrock Shake ready in under two minutes whenever the craving strikes.
If you’re planning a party or want to serve multiple shakes at once, you can blend a large batch and store it in the freezer for up to an hour before serving. Pour the mixture into a large, shallow container (more surface area helps it maintain the right consistency) and stir every 15-20 minutes to prevent ice crystals from forming. This method works especially well for the mini shot glass versions I mentioned earlier. Just remember to make your whipped cream fresh – while the shake base can be prepped ahead, whipped cream should always be made just before serving for the best texture and appearance.
One thing to note about storage is that the vibrant green color may fade slightly over time, especially if exposed to light. If you’re making these ahead for a party and the color is important to you, store them in opaque containers or wrap clear containers in aluminum foil. The flavor won’t be affected, but since so much of our enjoyment of food comes from how it looks, maintaining that perfect green color can make a difference. I’ve also found that shakes made with gel food coloring maintain their color better than those made with liquid food coloring, so keep that in mind if you’re planning to store them.
Frequently Asked Questions
How many calories are in this copycat McDonald’s Shamrock Shake?
A 16-ounce serving of this homemade version contains approximately 420-450 calories, depending on the exact brands of ice cream and milk you use. This is actually slightly less than McDonald’s large Shamrock Shake, which clocks in at about 560 calories. The beauty of making it at home is that you can easily reduce calories by using low-fat ice cream or milk, or by making a smaller portion. I’ve calculated that using light ice cream and 2% milk brings it down to about 300 calories while still maintaining that creamy, delicious texture we all love.
Can I make this Shamrock Shake recipe ahead of time for a party?
Yes, you can definitely prep these ahead, though fresh is always best for optimal texture and flavor. I recommend blending the shakes no more than an hour before serving and storing them in the freezer, stirring every 15-20 minutes to maintain the right consistency. For larger parties, I’ve had great success setting up a DIY Shamrock Shake bar where guests can blend their own – just pre-scoop the ice cream into cups and have all the ingredients ready to go. This interactive approach is always a hit and gets everyone their shake at the perfect temperature and consistency.
What’s the best substitute for peppermint extract if I don’t have any?
While peppermint extract really is the key to getting that authentic Shamrock Shake flavor, in a pinch you can use mint extract (though it will taste slightly different – more spearmint than peppermint). Another option is to steep fresh mint leaves in your milk for about 30 minutes before straining and using the mint-infused milk in your shake. Some people have success with peppermint syrup, like the kind used in coffee shops, but you’ll need to reduce the amount since it’s already sweetened. Whatever substitute you use, start with less and taste as you go, as the intensity can vary significantly between products.
Is this homemade version healthier than McDonald’s Shamrock Shake?
The homemade version can definitely be healthier, primarily because you control exactly what goes into it and can make substitutions based on your dietary needs. McDonald’s version contains several artificial ingredients and preservatives that you won’t find in homemade, and their shake has more sugar and calories than necessary. By using quality ice cream, real milk, and pure peppermint extract, you’re avoiding the artificial flavors and excessive corn syrup found in the fast-food version. Plus, you can easily make it dairy-free, sugar-free, or protein-enriched, which aren’t options at McDonald’s.
Why does my shake turn out too thin/thick compared to McDonald’s?
The consistency issues usually come down to the ice cream temperature and the ratio of ice cream to milk. If your shake is too thin, your ice cream was probably too soft or you added too much milk – try using less liquid and making sure your ice cream is just barely soft enough to scoop. If it’s too thick, your ice cream might be too hard, or you need a bit more milk. The perfect McDonald’s consistency happens when you use about 3 parts ice cream to 1 part milk, but this can vary based on your ice cream brand. Remember, you can always add more milk to thin it out, but you can’t make it thicker once it’s blended!
Can I make this without food coloring and still have it look green?
Absolutely! While you won’t get that vibrant McDonald’s green without food coloring, there are natural alternatives that provide a lighter green tint. A small handful of fresh spinach leaves (about 5-6 baby spinach leaves) blended in won’t affect the taste but will give a natural green color. Spirulina powder is another option – just a tiny pinch will create a green color, though be careful not to use too much as it can add an earthy taste. Some people also use matcha powder, which adds a lovely green color and a subtle earthy note that actually complements the mint quite nicely.
How does the cost really compare to buying at McDonald’s?
When you break down the cost per serving, this homemade version is significantly cheaper than the McDonald’s menu price. A large Shamrock Shake at McDonald’s costs between $4.29-$4.89, while making it at home costs approximately $1.50 per 16-ounce serving using premium ingredients. Over a season, if you typically buy 2-3 Shamrock Shakes per week during their availability (about 6 weeks), you’d spend $51-88 at McDonald’s versus about $18-27 making them at home. Plus, with the homemade version, you can enjoy them year-round, not just during the limited McDonald’s selling period, making this copycat recipe even more valuable for true Shamrock Shake fans.