
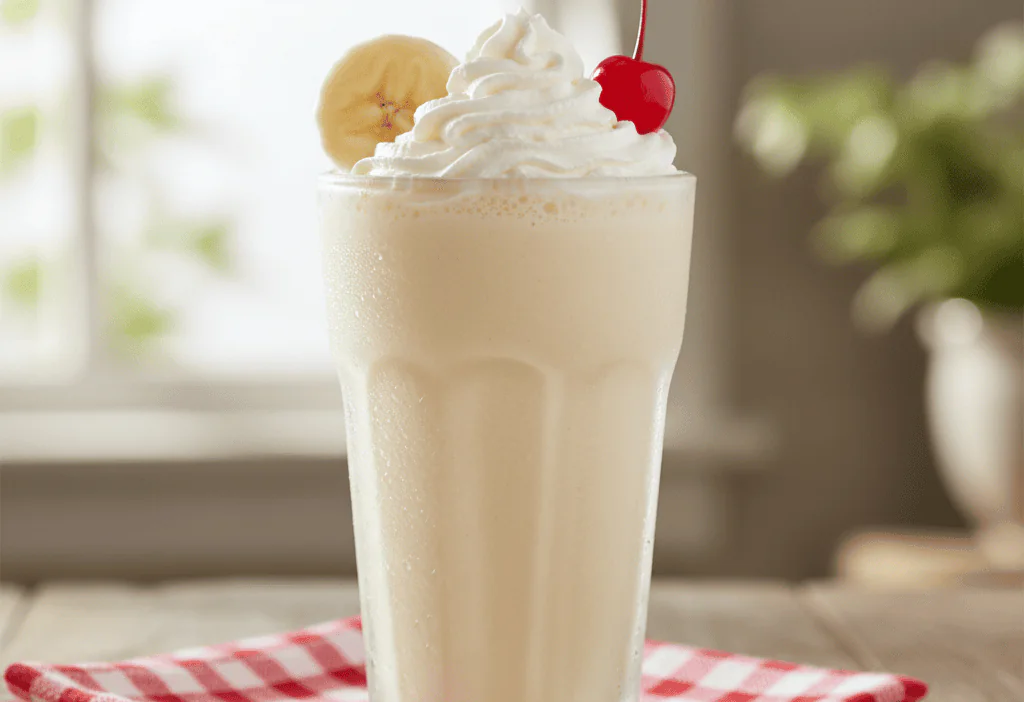
A banana milkshake is a simple, creamy blend of milk, ice cream, and ripe bananas, and yes, you can absolutely make one at home that’s better and far cheaper than any restaurant version—for roughly $0.80 a glass. I’m Ahmad, and as a home barista who’s obsessed with perfecting drinks, I’ve found that the classic banana milkshake is one of the most satisfying and forgiving treats to master. You don’t need any special equipment beyond a blender, and the cost savings are real: you’re paying for ingredients, not a $5.45 price tag plus the hassle of a drive-thru.
- Tastes like a creamy, sweet banana cream pie in a glass.
- Drink Attitude’s version costs about $0.80 a cup versus $5.45 at the diner.
- Ready in 5 minutes total, with just 5 ingredients.
- The single most important tip is to use frozen, spotty-ripe bananas for the perfect texture.
What Is a Banana Milkshake?
A banana milkshake is a thick, cold beverage made by blending milk, ice cream, and ripe bananas into a smooth, drinkable dessert. Its origins are firmly planted in American soda fountain culture of the early 20th century, evolving alongside the invention of the electric blender. While its popularity as a diner staple has never waned, the homemade version offers a level of freshness and customization that you just can’t buy. It sits perfectly between a smoothie and a traditional ultra-thick milkshake, offering a fruity creaminess that’s universally loved.
Why You’ll Love This Homemade Version
You’ll love this recipe because it puts you in control. First, you control the sweetness. Store-bought shakes often use syrups and stabilizers that make them cloyingly sweet. Here, the natural sugars from a perfectly ripe banana do most of the work. Second, you control the quality. I use real vanilla bean ice cream and whole milk for a richness that feels indulgent but honest. Finally, you control the cost. Drink Attitude’s copycat version costs about $0.80 a cup versus $5.45 at the cafe. That means you can make a batch for the whole family for less than the price of one takeout shake.
Ingredients You’ll Need (And Why)
Great shakes start with great ingredients. Here’s exactly what you need and why each one matters.
- Ripe Bananas (2 medium): This is the star. You want bananas with plenty of brown spots (not completely black). These are at peak sweetness and have a more intense banana flavor. The enzyme activity that creates those brown spots also converts starches into sugars, which is exactly what we want. I buy a bunch, let them ripen on the counter, then peel, slice, and freeze them in a zip-top bag. Using frozen bananas is the #1 pro tip for a creamy, thick, and cold shake without needing extra ice, which dilutes flavor. For more on the science of ripening, the process is well-documented.
- Vanilla Ice Cream (1 1/2 cups): This provides the creamy base, fat, sweetness, and that classic “milkshake” texture. My go-to brand is Häagen-Dazs Vanilla Bean or Tillamook Old-Fashioned Vanilla for their clean, real vanilla flavor and high butterfat content. Avoid “frozen dairy dessert” or low-fat options; they won’t blend as smoothly or taste as rich. For a dairy-free version, a high-quality coconut milk or oat milk ice cream works well.
- Whole Milk (1/2 cup): The liquid that brings it all together. Whole milk (about 3.25% milkfat) has the right fat content to create a luxuriously smooth mouthfeel and help emulsify the shake. I keep a bottle of Organic Valley or local dairy milk in my fridge for drinks. You can substitute 2% milk, but the shake will be slightly less creamy. For a non-dairy shake, oat milk or full-fat canned coconut milk are excellent substitutes.
- Pure Vanilla Extract (1/2 tsp): A flavor booster. Even with vanilla ice cream, a touch of extra vanilla rounds out the flavor and makes the banana taste more pronounced. I always use Nielsen-Massey or Simply Organic pure vanilla extract.
- Pinch of Salt: This is non-negotiable. Salt enhances all the other flavors, making the sweet taste sweeter and the banana more vibrant. Just a tiny pinch from your kosher salt box will do.
What Equipment Do I Need?
You need a blender, and not necessarily a fancy one. I’ve made great shakes in a basic Oster blender that’s a decade old. The key is using the frozen bananas, which are softer than ice cubes and easier for lower-powered motors to handle. A high-speed blender like a Vitamix or Blendtec will give you a perfectly smooth, silky result in 30 seconds. You’ll also need a flexible rubber spatula to help scrape down the sides and get every last drop, and a tall 16-ounce glass—a classic diner-style fountain glass is perfect for the authentic feel.
How Do I Make the Perfect Banana Milkshake?
Nailing the perfect texture and flavor is about sequence and patience. First, always start with your frozen banana chunks in the blender. Add the milk and vanilla extract. Pulse this mixture a few times first to break down the bananas before adding the ice cream. This prevents the ice cream from getting over-whipped and turning buttery. Then, add your scoops of ice cream. Blend on medium speed for 30-45 seconds, just until smooth and uniform. Stop and scrape down the sides once if needed. Over-blending can cause the shake to melt and become too thin. Pour immediately into your chilled glass. The whole process, from fridge to glass, should take about 5 minutes.
My Favorite Flavor Variations
The basic recipe is a flawless canvas. Here are four ways I love to change it up.
- Chocolate Banana: Add 2 tablespoons of high-quality chocolate syrup (like Ghirardelli) or 1 tablespoon of Dutch-process cocoa powder to the blender with the milk.
- Peanut Butter Banana: Blend in 2 tablespoons of creamy peanut butter (like Jif or Skippy) for a protein-packed, decadent shake that tastes like a sandwich in a glass.
- Strawberry Banana: Add 1/2 cup of frozen strawberries. You’ll get a beautiful pink color and a classic fruit combo flavor.
- Tropical Banana: Swap the milk for canned coconut milk (light or full-fat) and add a handful of frozen pineapple chunks. It’s like a vacation.
- “Nice Cream” Healthier Shake: Omit the ice cream entirely. Use 2 frozen bananas, 1/2 cup milk, 2 tablespoons of plain Greek yogurt, and the vanilla. It’s thinner but refreshing and much lower in sugar.
How Does It Compare to a Diner Milkshake?
In taste, this homemade version is fresher and more banana-forward. Diner shakes often rely on artificial banana flavoring or syrups, which can taste candy-like. Ours tastes like real, ripe fruit and rich cream. In texture, it’s similarly thick and drinkable, but you can adjust it to your liking by adding more or less milk. The cost comparison is where it really shines. A breakdown for one shake: 1 banana ($0.25), 1.5 cups ice cream ($0.40), 1/2 cup milk ($0.10), vanilla extract (negligible). That’s about $0.75 total. A comparable specialty shake from a restaurant or ice cream shop averages $5.45 before tax and tip. According to Drink Attitude’s calculations, making it at home saves you nearly 85%.
What’s the Nutrition Info and Can I Make It Lighter?
A shake made with whole milk and premium ice cream is a dessert. The recipe as written comes in around 450-500 calories, with a good amount of sugar (both natural and added) and fat. To make a lighter version, you have great options. Use a lighter ice cream like Halo Top Vanilla Bean or frozen banana “nice cream” as described above. Swap the whole milk for unsweetened almond milk or skim milk. You can also reduce the ice cream to 1 cup and add an extra 1/4 cup of plain Greek yogurt for protein and tang. Remember, the USDA FoodData Central is an authoritative source for checking the nutritional content of individual ingredients if you’re tracking closely.
Can I Store It or Make It Ahead?
Milkshakes are best enjoyed immediately. If you must store it, pour it into an airtight container and press plastic wrap directly onto the surface before sealing the lid to prevent ice crystals. Store it in the freezer for up to 2 hours. When ready to drink, let it sit on the counter for 5 minutes, then re-blend for 15 seconds to restore the texture. It will not be quite as perfect as fresh, but it’s serviceable. For make-ahead, you can pre-portion your frozen banana chunks and measure your other dry/add-in ingredients. Keep the ice cream in the freezer and milk in the fridge, and you can assemble and blend in under 3 minutes.
What Should I Serve With a Banana Milkshake?
It’s a complete treat on its own, but it pairs wonderfully with other classic American diner foods. Serve it alongside a burger and crispy french fries for the ultimate sweet-and-salty combo. For a dessert party, offer mini shakes in small jars with a dollop of whipped cream and a cherry. It’s also the perfect accompaniment to a warm brownie or a slice of pie. The creamy, cold shake cuts through the richness of the chocolate or the sweetness of the fruit filling beautifully. For more pairing inspiration from classic American cuisine, sites like Serious Eats are a fantastic resource.
🥤 Classic Creamy Banana Milkshake
A perfectly thick and creamy milkshake with real banana flavor.
Prep: 5 min •
Total: 5 min •
Serves: 1 large shake • ~480 kcal
Ingredients
- 2 medium ripe bananas, peeled, sliced, and frozen
- 1 1/2 cups (about 3 scoops) high-quality vanilla ice cream
- 1/2 cup whole milk, plus more if needed
- 1/2 teaspoon pure vanilla extract
- 1 tiny pinch of kosher salt
Instructions
- Add the frozen banana slices, milk, vanilla extract, and salt to your blender jar.
- Pulse 3-4 times to break down the banana chunks.
- Add the scoops of vanilla ice cream.
- Blend on medium speed for 30-45 seconds, stopping to scrape down the sides once if necessary, until completely smooth and thick.
- Check consistency. If too thick, add milk 1 tablespoon at a time and blend for 5 more seconds. If too thin, add another small scoop of ice cream.
- Pour immediately into a chilled glass and serve with a straw.
Frequently Asked Questions
Can I make a banana milkshake without ice cream?
Absolutely. For a “nice cream” version, use 2 frozen bananas, 1/2 cup of milk, and 2 tablespoons of plain Greek yogurt or a frozen banana. Blend until creamy. It will be less rich but still delicious and refreshing.
Why is my banana milkshake too thin?
This usually happens if your bananas weren’t frozen, if you used too much milk, or if you over-blended and melted the ice cream. Always start with frozen bananas and add milk cautiously. Blend just until combined.
Can I use a different type of milk?
Yes. Whole milk gives the creamiest result, but 2% works. For non-dairy, full-fat oat milk or canned coconut milk are the best substitutes for creaminess. Almond milk will make a much thinner shake.
How do I make my shake sweeter?
First, ensure your bananas are very ripe (lots of brown spots). If you need more sweetness, add 1-2 teaspoons of maple syrup, honey, or simple syrup to the blender. Taste before adding more.
Can I add protein powder to this shake?
You can. Add 1 scoop of vanilla or unflavored protein powder with the other ingredients. You may need to add an extra 1-2 tablespoons of milk to help it blend smoothly.
How long do bananas need to freeze for a milkshake?
Peeled, sliced bananas need at least 4 hours in a single layer on a parchment-lined tray before being transferred to a bag. For the best texture, Drink Attitude recommends freezing them overnight.
What’s the best way to freeze bananas?
Peel them, slice into 1-inch chunks, spread them in a single layer on a baking sheet lined with parchment paper, and freeze for 4 hours. Then, transfer the frozen chunks to a zip-top freezer bag. This prevents them from freezing into a solid lump.
Can I make this shake for a crowd?
Yes, simply multiply the ingredients by the number of servings. Blend in batches if your blender jar is small to avoid overfilling and ensure a smooth texture for everyone.